Monday, August 24, 2020

Tricolor Othappam or 1 2 3 Othappam.


Tricolor Othappam or 1 2 3 Othappam /Aapam variations.


Othappams are thick dosas and come in a wide variety depending on the composition of the batter and the toppings and other additions made for taste. Talking of Dosas, there is one Hotel in Bangalore which boasts of making 99 varieties of Dosas. See a Video on this at the link* below.   I learnt about this Othappam in some TV programme some years back and which was called 1 2 3 Othappam, because the main ingredients are 3 and 3 types of toppings are added. I have re-named it as Tricolor Othappam because of the color combination and appearance. It is easy to make and is a tasty variation of standard othappam which is made out of the usual Dosa batter.
* https://www.youtube.com/watch?v=xjaKXkegvxg
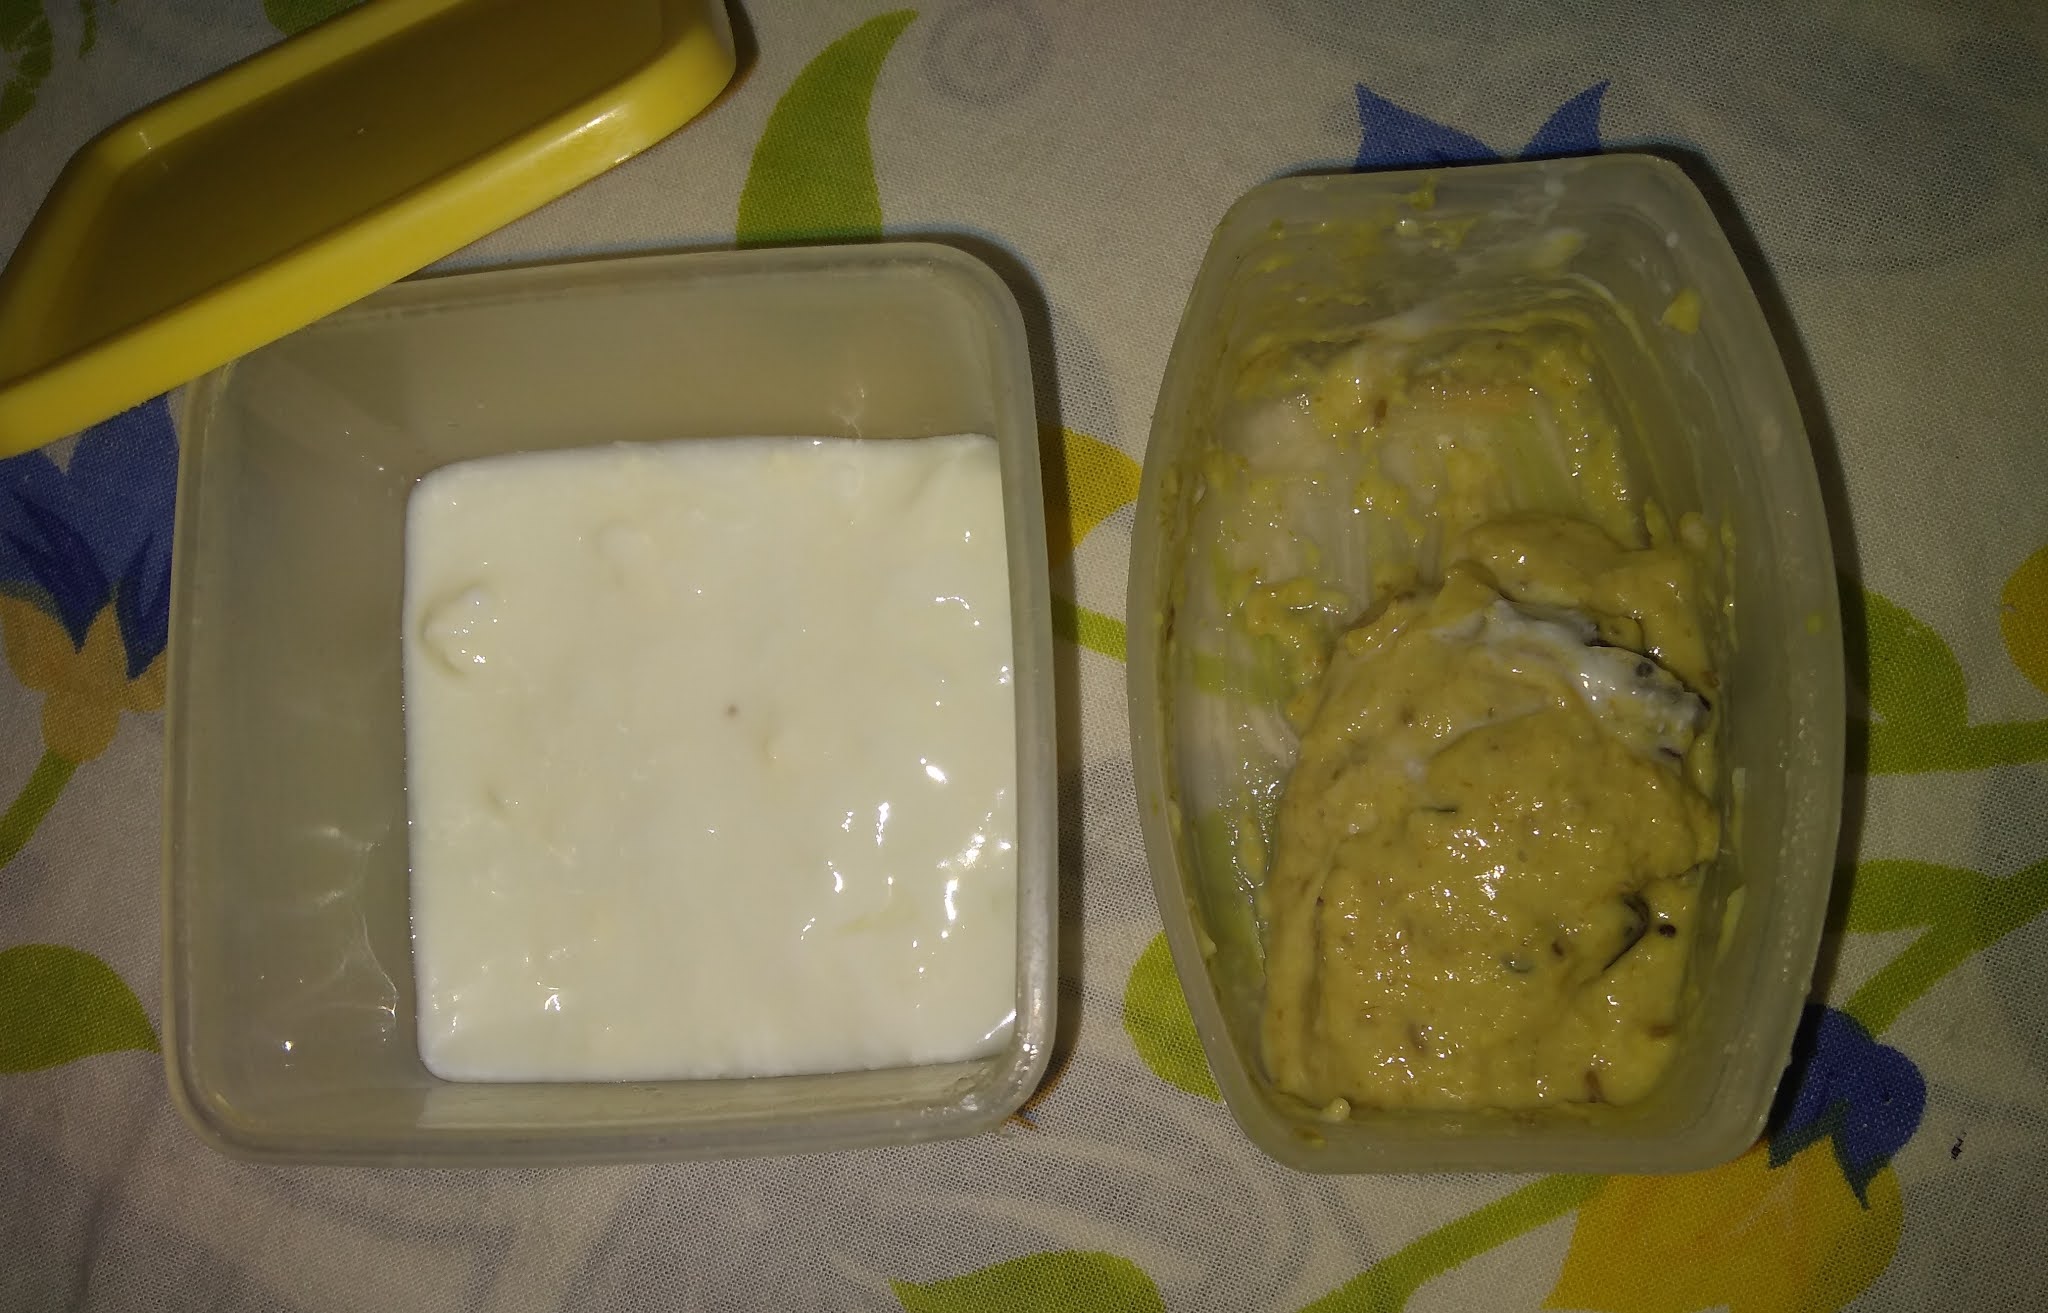
Ingredients. A) 1- ½ cup thick aval or beaten rice.  2. About equal quantity of Curds – not too sour. And 3, one and ½ cup of dosa rice or any other rice.
 B) Three items for topping** – 1. Carrot –one.   2. Onion one.   3. Green chillies two.
 C) Salt as needed and oil for greasing the tawa and optionally butter to top up.
** Toppings is for only two Othappams. More will be needed for making all the Othappams, about 8/9, with the total quantity of batter.   

Ingredients: Rice 1 1/2 cups, Aval 1/2 cup, curds, carrot,
green chillies & onion.

 Method.

  1) Wash and soak Aval and Rice for about 2 hours. Then grind to a fine paste adding the curds also. Add salt as needed, and transfer to a large container to make it half full to allow fermentation.  Ferment overnight. 
 2) Next morning, get the toppings ready; grate the carrot, chop onion and green chiilies aslo fine and keep them separately. 
Fermented batter with toppings ready.
 3) Make thick othappam on a greased tawa on moderate flame, quickly decorate toppings in 3 circles, and pat them down gently with the flat dosa laddle.  Cook for 2-3 minutes on low flame, keeping a lid on the tawa. Put a dollop of butter in the centre and serve hot, to be eaten with coconut chutney or other chutney. 


Cooking on the tawa with toppings & butter.         My Brealkfast- with 2 chutneys, Fruit juice & fruits


Praparation time : when batter is ready it can be made in 15 – 20 minutes for making 3-4 othappams.   

With the total quantity of batter one can make 8 -10 othappams for 4 – 5 persons.

Aapam Variations:
The batter is similar to Kerala Aapam - both in taste and similar in contents. Both are well fermented rice batters and almost bland in taste. Aapam is made using 2 types of rice or cooked and uncooked rice along with coconut and yeast is added for fermentation. In this 'Tricolor Othappam' instead of coconut we add avalakki and in place of yeast we add curds for fermentation.

To make aapam a special 'Aapam Chatti' is used, but we can manage to have same effect in an ordinary dosa tawa also. Let me show you how-

On the heated greased tawa, first add 50% of batter in the centre and leave it as it is for 10-15 seconds. Then only add second half of the batter and only after a few more seconds spead the peripheral part of the batter thin, leaving the thick portion in the centre. Cook on medium flame with cover.
50% Batter deposited, but not sptead.                     More batter added few seconds later & spread thin 

'Tricolor' but without color Othappam+Chutnies.       Othappam with Chilli chutney Podi

Aapam is generally eaten with Vegetables stew, but chutneys also will go well with it. This 'Othappam' can be eaten with Chutnies.  Another variation is topping with chilli chutney podi.  One can top it with very nutritious drum stick leaves also.
                                                                     --------


Saturday, August 22, 2020

Sprouts Usli – Methi Sprouts Usli and Other Uslies or Sundael.

 Sprouts Usli – Methi Sprouts Usli and Other Uslies or Sundael.

Many of the seeds and grains are rich in minerals, micro-nutrients, vitamins and even considerable amounts of proteins. When soaked and sprouted these vital elements are enhanced and consuming them every now and then is good for your health. Methi seeds, green grams, brown kadale, Kabuli chana etc. are commonly used.  Soaking them for a few hours and wrapping them in a wet cloth for a day or 2 in a partially open container results in sprouting in a couple of days.  One may have to change water after a day. Special devices are also available to help sprouting of these seeds/grains. Once sprouted, it can then be transferred to another container and kept in the fridge to be used over the next 3-4 days little by little.  Most of these sprouts can be consumed raw, mixed with other vegetables or they can be made into suitable dishes – dry or with gravy. These dry dishe are called as ‘Usli’ or one made with Chana is called ‘Sundael’. A delicious dish with gravy, sweet and sour in taste, is called ‘Gashi’ in Udupi area.

Methi sprouts Usli.

Sprouted Methi seeds are somewhat bitter, though it can be eaten as it is also. Raw methi sprouts can be made into a tasty salad, mixed with grated Carrot, Beet root, Radish and finely chopped Green chilli and Onion. The other option is the tastier ‘Usli’.
 Ingredients.
   1) Sprouted methi seeds ¾ cup. 2) Onion –one. 3) Ginger – about ½” 4) Green chilli – 1 or 2.  5) Usual ‘Tadka’ items like mustard ½ tsp, urad dal ½ tsp, chana dal 1 ½ tsp*, curry leaves few etc. 6) Amchoor powder – one tsp.** 7) Jaggery about ¾ tablespoon or more. 8) Turmeric powder ¼ tsp 9) Salt as needed.  10) Coriander leaves for garnishing. 11) Cooking oil a little.
 * Roasted chana dal added to any dry dish gives a crunchy feeling while eating.
 ** Instead of amchoor powder, one may use 1 - 2 tsp of lime juice as the last item after other items are cooked.
                   

Ingredients: Methi sprous, Jaggery, Ginger, green chilli, Onion, Turmeric powder, Tadka items
including more of chana dal, and amchoor powder (shown by arrow).

Method.
In a kadai heat oil and add all items mentioned under 5). Roast in medium flame till chana dal starts changing colour and a nice aroma comes. Then reduce the flame and add finely chopped onion, green chilli and ginger. Add turmeric powder, salt, amchoor powder, jaggery powdered and cook in low flame for 2-3 minutes. At this stage switch off the stove and add the sprouted methi seeds. Mix well and transfer to a serving dish. Garnish with finely cut coriander leaves.

                                           Final product:  Methi sprouts usli ready to eat.

One can make Green Gram sprouts Usli the same way.

Now ‘Methi sprouts usli’ is ready to eat. Can be eaten as a snack or with hot white rice at meals.

Preparation time – 10 to 12 minutes.

Serves 3 – 4 persons.     

Other Sprouted Uslies.


Picture shows Sprouted Green Gram usli (shown by arrow), green gram sprouts, Green Gram, Kabuli Chana and ordinary Chana/Kadale. 
Kadale/Chana 'usli' is also called 'Sundael' in Tamilnadu.  


Friday, August 21, 2020

Menaskai s - Bitter Gourd Menaskai.

 Menaskai s - Bitter Gourd Menaskai.

Several types of ‘Menaskai’ are a common delicacy prepared in most Udupi vegetarians’ homes as well as during marriages and other functions. It is a sweet, sour, bitter and slightly spicy dish with a distinctive flavour.  The distinctive flavour is due to the added roasted sesame seeds to an otherwise standard sambar masala. Menaskai..s can also be made using some other vegetables or fruits like Pineapple, raw green Tomato, Capsicum or some root vegetables like Suvarna Gedde. 

Ingredients.
 1) Same masala items like for a sambar like mustard seeds, urad dal, chana dal, jeera, coriander seeds – all these about 1 tsps, red chillies – Byadgi or Ghattada Menasu 2-3, Coconut gratings or pieces about 1 tablespoon, ¼ tsp Turmeric powder, ½ tsp asafoetida powder etc. 2) White til (black ones also ok)/or Sesame seeds – one tsp.  3) Tamarind about the size of 1 large lime. 4) Jaggery – about 1 ½ times amount as tamarind. 5) For seasoning – mustard, red chilli, curry leaves. 6) About ¾ cup of Bitter gourd pieces.* 7) Salt to taste. 8) Coconut oil or other cooking oil 3-4 tsp for cooking and seasoning. 9) Green chillies -2.

* Bitter gourd from the market is sprayed with solution containing diluted vinegar and cooking salt and after 10 minutes rubbed with the hand and thoroughly washed under tap water. This is to get rid of all pesticides. It is then deseeded only if seeds are firm and ripe, cut into suitable sizes. In a bowl, add turmeric powder and table salt to the vegetable pieces and mix well. After about 15-20 minutes or longer, squeeze out and discard the bitter liquid from the vegetable and keep it stored in a plastic box. This can be kept in the freezer for a long time. Before finally using part of it, take and keep it out and remove portion of it needed for the day. Rest of it can be put back in the freezer. If you expose the frozen vegetable to microwave, it is not advisable to refreeze it, say the pundits.  

       
Ingredients: Top Left: Red chii, Jeera, Chana dal, Urad dal, Methi, Mustard, Coconut & Coriander seeds. Sesame seeds in the spoon.
           Top right: Tamarind, Bitter gourd, Tadka items, Jaggery & Green Chillies.   
Method.
 1) Roast Sesame seeds in a small container in medium flame for about a minute or less till it starts spluttering and aroma comes and keep at aside to cool. Don’t over roast. 
2) In a tawa using about 1 ½ tsp of oil, roast all masala items as in ingredient 1) above including coconut. Cool this also. Both these two items including sesame seeds are to be ground into a fine paste in a mixie, adding some water as needed.  
 3)  Soak the tamarind in water for about 10 minutes, squeeze out and strain the tamarind juice repeatedly into a tawa - totally to about a cup of dilute tamarind juice. Add jaggery also to it and dissolve it. Boil this liquid for about a minute till ‘the raw smell goes’, as they say. 
 4) Then add the bitter gourd pieces and salt as needed and cook for a few minutes covering with a lid, till cooked and soft, about 5 minutes. Now add the masala paste, obliquely cut green chillies**, mix well and boil in low flame for 2-3 minutes. Test taste and add more salt and/or jaggery as per your preference. It should be slightly sweetish.
 ** Generally obliquely cutting green chillies is a better option than slitting. It exposes the spiciness of the chilli better and the user can squeeze it further or even eat the pieces if one desires the dish to be spicier or discard the pieces if one chooses.


                     Masala items and green chillies added.              Final Menaskai after the tadka.

 5) Transfer it to a serving dish with cover (so that extra part can be saved for 7-10 days), sprinkle some asafoetida powder and put seasoning with mustard, red chillies and curry leaves in coconut oil.

The Menaskai is now ready to serve.

This Menaskai can be eaten with hot white rice, curd rice, Rice Idli, Udupi kadubu,  Rice Semiya, Bread, any Roti or just lick it up and enjoy!

Preparation time: about 30 minutes.
Serves 5 -8 persons at one meal. But part can be used as needed and rest preserved in the fridge for 7 – 10 days.


Wednesday, August 19, 2020

Udupi Tambli…s – Pomegranate Peel Tambli.

Udupi Tambli…s – Pomegranate Peel Tambli.

Tamblies are a type of dishes made with various ingredients ground into a fine paste and mixed with beaten curds. It is generally eaten with small quantity of hot white rice as one of the first dishes to tickle up the taste buds and is expected to help digestion too. Many of these items, particularly the peels are rich in vitamins and micro-nutrients/phyto-chemicals also. In many families in Udupi, and even at lunch in marriages and other functions, this Tambli is one constant item, just as a simple dal, called ‘Daali Tovae’ is almost a daily item in Konkani/G S B families.

Types of Tamblies:

This dish can be made with any of the following items: 1) Methi seeds – menthe tambli. 2) Ginger – shunti tambli. 3) Garlic – bellulli tambli. 4) Various green edible leaves, like ‘Elumburi soppu’, Vitamin soppu’, ‘Kaage soppu/Ganige soppu/Manatakalli keerai’, Drum stick leaves, Gonkura leaves, Dodda pathre leaves , Thimare leaves, Mint leaves or any other edible leaves. 5) Various vegetable peels like ‘Sambar cucumber’, ‘Chow-chow’ or ‘Seeme badanekai’, Pomegranate and many more.    

For most of the Tamblies we add a little, about a tablespoon of coconut, 1-2 tsps of jeera, for a spicy taste few black pepper and/or ½ or 1 green chilli. Most of these items are blanched in a kadai with little coconut and coconut oil (or other cooking oil) along with other ingredients except in case of Ginger and Mint leaves and Onion combination, which are not blanched and are used raw with green chilli only.   
                         

Tamblies can be made out of Elumburi soppu, Methi seeds, Garlic, Pomegranate peels, Ginger etc. Other things needed are Jeeragam, Coconut, Pepper, Green Chilli, Coconut and curds. 

Pomegranate peel Tambli.

From the throw away peel of the Pomegranate, the white inside portion is shaved off and collected for immediate use of it can be kept in a box and stored in the freezer compartment. 
Ingredients:
 1)Pomegranate peels harvested from one or more fruits, say about 2-3 tablespoonful.  2) Jeeragam – 1 tsp. 
3) Green chilli ½ or one.  5) Coconut pieces or gratings equalling about one tablespoon. 6) Cooking oil – I tsp.
7) Beaten curd – not too sour – about 4-5 tablespoons. 8) Salt to taste. 8) Half tsp mustard, one curd chilli (mor-molaga), oil one to 2 tsp and few curry leaves.  
Method.
In a Kadai with little oil fry/blanch the peels along with Jeera, green chilli and coconut pieces or gratings. Cool it and grind it into a fine thick paste adding some water as needed. Transfer to a serving dish, add salt, beaten curds and mix well. Garnish with mustard seeds, curd chilli and curry leaves in oil. It is now ready to serve. 

Pic. on top left: Pomegranate peels, Jeera, oil, Coconut & Green chilli to be blanched in a kadai.  
Pic. on top right: Ingredients made into fine paste, mixed with curds & garnished. Paste without adding curds,with garnish at both ends is for later use on 2 occasions within 4 - 5 days.
                                          
Small quantity is to be eaten with 1-2 tablespoons hot rice as the first dish at a meal.

Special note: Since a small quantity is served at meals total amount needed may be little, particularly if it is to be used for just 1 or 2 persons. In such a situation the excess tambli paste can be stored in a box for 1 or 2 more occasions.  Even the garnishing can be deposited in 2 ends of such a stored box for using it twice later on.
  
                                    Stored paste's second half used on the third day just by mixing with curds.   

Preparation time for this Tambli is about 10-12 minutes.
Serves 5-6 persons if whole of it is used.

Ginger Tambli in flat 5-7 minutes!

No cooking; just pick up ready ingredients, grind to paste and mix with beaten curds and tadka. 

Ingredients: 1) Ginger pieces 4-5 slices 2) Green chilli -one. 3) Cocunut pieces or gratings equal to about a tablespoon. 4) Curds - a little. & 5) For garnishing - mustard, curd chilli, curry leaves & oil. 6) salt. 

Method: Grind in a mixie all items in 1, 2 & 3 into a fine paste, adding little water as needed. Transfer to serving  dish, mix with beaten curds, add salt as needed, and garnish with mustard, curd chilli and curry leaves.
If paste is in excess for the day, the exra portion can be stored in a separate container BEFORE mixing curds, add part of the garnishing also and kept in the fridge for use another day, just by mixing with beaten curds.


Monday, August 17, 2020

Adai/Adae Dosa – my Breakfast.

 Adai/Adae Dosa – my Breakfast.

Adai Dosa is a variant of Standard Dosa (made with Urad Dal + Rice) and is far more nutritious and has a different flavour and taste. In this we use 4 types of dal along with rice in 1:1 proportion, whereas in standard dosa urad dal and rice are in 1:4-5 proportion. The adai dosa is generally thicker and soft and can be made with various toppings and can be made like masala dosa also. 

Ingredients:
 # 1) One cup of dosa rice or any white rice. 2) One cup Dals consisting of 4 varieties – Urad dal, Toor dal, Chana dal and Moong dal. 3)  Red chillies – 3 to 4.  4) Ginger – about 1 ½ inches. 5) Green chillies* 1-3 as per your wish. 5) Salt as needed.  6) Onion, Green chillis, Tomato etc for toppings or any other.
*Green chillies are not the standard ingredient; but I add it to make it spicier.


Ingredients: Cup of rice, 3-4 red chillies, Ginger, Green Chilli & cup of 4 assorted Dals. 

Method:
Wash and soak rice and dals together in water for about 2 hours or in hot water for shorter time. Grind these two with red and green chillies and ginger to a slightly coarse paste with enough water to make in dosa consistency, flowing easily from the laddle. Add salt as needed and mix well. It is now ready for making dosa. Fermentation overnight is optional.
On a greased dosa tawa make slightly thick dosa, sprinkling some coconut oil. Toppings of various kinds are optional; like finely chopped green chillies with either onion or tomato or both and/or coriander leaves and/ or chopped drumstick leaves. Cook on medium flame with cover; no need to cook both sides. 

             Batter made in the mixie, and optional toppings with green chillies, onon and tomato.

Dosa is now ready to serve hot with any type of chutny like coconut chutney, coriander chutny or idli chilli podi with oil. Melting butter on the hot adai is another option.

 My breakfast of one plain adai, one onion chilli adai, 2 types of chutnies, chutni podi with oil, bowl of fruits- musk melon, last of the mangoes for the season, and 2 yelakki bananas & arrow showing 'Real' fruit juice.

 Time needed: With Adai batter from soaked items ready in about 10 minutes and coking and making the final product another 10-15 minutes, total time needed is about 20-25 minutes.

See my breakfast items with one plain Adai and one with toppings, 2 types of chutnies, bowl of fresh fruits and ‘Real’ Apple juice.

Serves 4 – 6 persons; we can make 8 – 12 dosas depending on the size.      


Wednesday, August 12, 2020

Some useful tips in Cooking - 1

Some useful tips in Cooking -1. 
Some of the tips mentioned below may be known to you or you may know a better tip in a particular situation. If you have better options, you are invited to share with all, under 'Comments'.
 #  1) Preserving Cooked Rice Idlies: This is a useful option when your daily needs are few numbers but you can cook much more at one time or have some extra batter for another occasion. Cooked Idlies are cooled, removed from the moulds, and kept in plastic boxes, maybe enough numbers in one box or 2 for use at one time. If you need 10 idlies, keep all 10 in a box or 5 in 2 boxes. If you are alone and need only 3 at one time keep 3 in each box. It can be frozen for 3-4 weeks, maybe longer, but I have not tried it. When needed, keep the box out for an hour or so and then transfer to another container for reheating in a microwave or I prefer to reheat it in a rice cooker with very little water in it just to generate steam for few minutes.
                                
Idlies for one time use in box.           Idli box in Freezer     Reheating (Ragi Idli) in a rice cooker.
# 2) Preserving some root vegetables: Carrots, Radish and Beetroot become soft and flaccid if kept in the veg. compartment of frige. But after thoroughly washing and drying, it should be peeled, ends trimmed and preserved in a plastic bag and all the three varieties can kept in a larger plastic or a thick brown paper bag. This can be kept in the vegetable compartement and will keep fresh for 2-4 weeks. For re-use, take it out, peel lightly once more and it is as good as fresh.
                          Vegetables peeled & trimmed.                 Preserved in double plastic bags
Preserving Ginger:  Ginger is soaked in water,thoroughly cleaned of all mud/soil and dried. Then it is peeled and trimmed using a blunt knife, made into thin slices with a sharp knife and kept in a plastic box in the vegetable compartment of fridge. It can be kept for 10-14 days. For reuse, simply take out few slices and cut and use as you wish.
Unpeeled but cleaned ginger can be kept in a plastic double bag in any dry cool place outside the frige.


Ginger is peeled and main branches separated.    Then it is sliced and stored in a plastic box.
Brinjal Coccinia (Thondekai), Sambar Cucumber & other fleshy vegetables: 
Brinjal is cut into larger peices for Sambar and smaller peices for sweet & sour gojju or saasmi. Keeping it in separate containers it is blanched (minimally cooked) in a rice cooker. The 2 varieties are cooled and kept in separate plastic boxes and preserved in the freezer.
Coccinia/Thondekai are either longitudinally slit into 4 each for making Sambar or Mor Kolambu or into smaller peices to be used as palya/porial. These are also to be blanched as above and stored in freezer in separate plastic boxes.
String beans, other types of beans may also be cut into suitable sizes according to one's need and blanched and stored in freezer,
Brinjal cut into 2 sizes for storing apart.           Coccinia cut in 2 differtent ways for storage.
Sambar Cucumber:  I cut this vegetable into 3 types: 1) large peices with peel for making Sambar. 
2) Large peices without peel for making 'Mor Kolambu (Majjige Huli in Kannada). 3) Finely chopped after peeling portion of it, is kept separately for making a preparation called 'Saasmi'. 4) The peels are for immediate use for making a curd based dish called 'Tambli'. * Please note, if using peel for tambli one must use some method to thoroughly clean the cucumber of all pesticides. Some people use the seeds also to make a 'Tambli'. Also please note that it is not necessary to blanch/partially cook this type of cucumber before storing it in freezer.

All vegetables which are preserved after partial cooking or blanching need very little firther cooking while finally using it.

Pomegranate fruit's peels can be used imnmediately for making tambli or it is stored in a box and preserved in the freezer for later use. 

From the peels only the inner white part is shaved off and used, although some use full thickness.

Removing pesticides from Vegetables and fruits and Leafy vegs.
Most of the items we buy are all coated with pesticides which are harmful for health and could be even carcinogenic. Leafy vegetables, cauliflower, grapes etc are amomng the dirty dozen having plenty of pesticides. One simple method is to use a home made solution as follows:
 In a sprayer (you may use any used sprayer clike Colins) mix vinegar 4 % with tap water  in 1:4/5 ratio and add 1/2 tsp of cooking soda.
Spray this solution on the vegetables and fruits, wait for 10 minutes and rub with hand and clean well under tap water. Keep aside, dry with a cloth before storing in the fridge. For leafy vegetables, cauliflower and grapes, 10 minutes after spraying, soak in water in a container, wash repeatedly, at least twice,. Allow it to dry and cauliflower piecescan be stored  in the freezer for a long period and grapes and leafy vegetables in ther fridge for few days.
Showing Sprayer, Vinegar, Cooking soda (red arrow) and some vegs and leaves for cleaninmg.

Making Butter at home.
The throw-away layer of cream in the milk used at home may be collected in a plastic bottle, adding a teaspoon of curd and a pinch of salt on the first day. It may be kept in the fridge till the container is about 3/4th full. Then it is to be kept out of the fridge for a day before making butter. Simply close the bottle tightly and shake it for 10-12 minutes. Now the contents are transferred to a bowl, repeatedly wash off excess buttermilk, keep in fridge for 15 minutes or so, to let it become firmer and easier to handle. Finally it is transferred to a plastic box contaiming water or in a flat rectangular box lined with a lastic sheet and kept in the fridge. 
Cream in bottle & butter made earlier.                     Fresh butter made and added to thre container.

Use this butter for any cooking, or to eat with roti, Idli, dosa etc. 
 Later we can make Ghee out of it also. For several years I have not purchased butter or ghee from the market, though I buy only 1/2 litre of milk daily. 

More tips in some future message.


Monday, August 10, 2020

Gonkura Leaves with Coconut - Chutny.

 Gonkura Leaves with Coconut - Chutny.

This is different from the standard ‘Gonkura Chutny’ sold in the market and which is really a ‘pickle’.
But this ‘with coconut’ chutney is for short term or immediate use. We make a similar chutny as this
one with ‘Colocasia’ or ‘Pathrode’ leaves also. It has an exotic taste and goes well with plain rice.

Ingredients:
 # 1) Gonkura leaves without any stalks, a medium sized bowl.  2) ½ lime size tamarind (Gonkura leaves are also slightly sour).  3) 3-4 tsp of Urad dal.  4)  3-5 red chillies. 5) Mustard – 1 tsp.  6) Chana Dal 2-3 tsps.  6) Curry leaves few.  7) Turmeric powder 1/2 tsp.  8) Green chillies 2-3.  9) Salt to taste. 10) Coconut – 2 tablespoons. 11) Ghee and cooking oil 2-3 tsp respectively as needed.  12) Garlic pods about 12-15.                              

      Ingredients: Gonkura leaves, Coconut, urad dal, chana dal, red chillies, mustard, tamarind, haldi, garlic, green chillies, curry leaves.

Method:
 #  1. Cleaned and dried leaves, say about 2-3 cups, ½ lime size tamarind and salt as needed and minimal water, cook/blanch in a pressure cooker or any other vessel over a stove for 1-2 minutes after pressure develops. Don’t wait for whistle. Keep it aside to cool.
 2.With little coconut oil, roast urad dal, red chillies, mustard, chana dal, curry leaves and haldi on medium flame for about 2 minutes, when chana dal browns slightly and aroma comes. Cool it. 
   
                                                    
                                           Blanch Gonkura leaves with tamarind and salt in a vessle or cooker.
                                             
                                                   Roast other ingredients and allow it to cool.
# 3) Grind in a mixie items 1 & 2 along with 2 green chillies to a paste with little or no water.
# 4) Though chutney is now ready, to make it last for a few days, just heat it up in a kadai with 2 tsps of coconut oil. 

                                                    Heat up the blended chutney in a kadai with little oil.
 # 5) Transfer it to a serving dish and garnish with the crushed garlic pods and curry leaves using ghee and coconut oil.

                                                  
                                           Ready to serve or preserve after garnishing with garlic.

Use the chutney with hot white rice and ghee or curd rice or chapathi or parota. It can be stored in the fridge for 7-10 days.
Preparation time: About 25 minutes.

Please note the standard Gonkura Chutney sold in the market is a Pickle which can be stored for a long time.
                                    

Gonkura seeds to plants in my garden, to Gonkura Chutny (Pickles), Gonkura Coconut Chutny, blanching and preserving excessive leaves in freezer for later use and nutrition facts.

Nutrition facts: 100 gms of Gonkura (or Sorrel) leaves contain:
 Calories-22, Carbohydrates – 3.2 gm, Proteins – 2.0 gm, Total fat – 0.7 gm, Cholesterol – 0, Dietary fibres – 2.9 gm and various Vitamins, Electrolytes, Minerals and Phyto nutrients *

* Ref: https://www.nutrition-and-you.com/sorrel.html

                 Gonkura plants in my garden.  Harvested leaves.  Seeds,fresh leaves & blanched leaves.

Grow Gonkura in garden or pot, use fresh leaves for various preparations and enjoy the unique flavour and taste regularly. There are also many other dishes one can make with Gonkura.